Welcome to My First Hexo Blog!
hexo环境搭建
前置条件
- 请先确保你有node 一路next 不要手残把默认选中的add to path取消
- 请先确保你有 git bash 否则没有往下看的必要了
在 GitHub 上新建一个空仓库 repo
仓库名称是你github账户名 比如我的是slTrust 那么你新建的仓库名就会是这个格式 slTrust.github.io
安装 Hexo 命令行工具
1
| $ npm install -g hexo-cli
|
初始化你的博客比如 myBlog
进入你的博客目录
安装依赖
新建第一个博客 firstBlog
这样会出现一个 .md文件 在 source/_posts目录下
编辑这个文件,注意是markdown语法
1
| $ start source/_posts/firstBlog.md
|
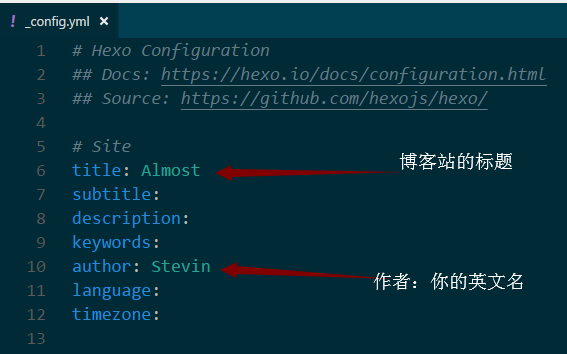
start _config.yml,编辑网站配置
- 把第 6 行的 title 改成你想要的名字
- 把第 9 行的 author 就是作者
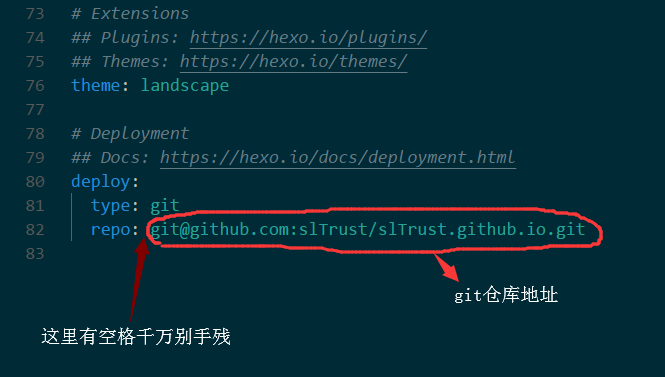
- 把最后一行的 type 改成 git
- 在最后一行,与 type 平齐,加上一行 repo: 仓库地址 如 git@github.com:slTrust/slTrust.github.io.git
注意这个配置的 repo参数 仓库名是 你新建的空仓库 一定一定一定是你账号名的格式 slTrust.github.io
这样你的 repo 参数就可以设置为这个 git@github.com:slTrust/slTrust.github.io.git
安装 git 部署插件
1
| $ npm install hexo-deployer-git --save
|
发布
进入你的github仓库
注意注意 你刚刚新建的仓库名 一定是这个格式 你的github用户名.github.io 如 我的是 slTrust.github.io
预览地址!
如何创建博客
新建博客
编辑你的博客 复制显示的路径,使用 start 路径 来编辑它
1
| $ start 'source/_posts/test002.md'
|
重新初始化你的博客
部署